As a longboarder, when you hear the word, “bluntslide” you automatically think it’s a trick that can only be performed on hard wheels with short double kicktail boards. I’m here to tell you that’s a myth!
The glove down bluntslide is an incredibly versatile trick that can be performed on any type of board as long as it has at least one kicktail. You can use soft or hard wheels, making it truly a trick for all riding disciplines.
Glove down bluntslides can be done heelside or toeside, one footed or two footed, off the board’s nose or tail, or even both when you start getting comfortable!
This guide will focus on how to heelside glove down bluntslide. In order to safely practice this trick you should be very comfortable with glove down Colemans at speeds of at least 10 miles per hour.
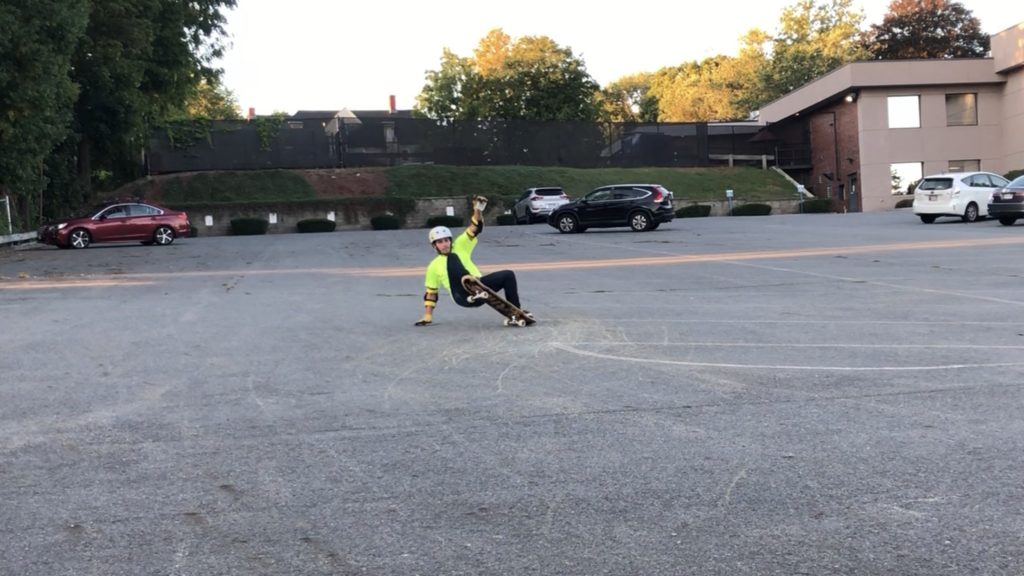
To practice dragging your tail on the ground if you’re not used to it, you can get into the heelside blunt position (shown below) stationary to experience the feeling of pushing your tail to the ground.
It’s also helpful to know how to get back up from a layback style slide where both your hands are on the ground behind you. While learning, there is a good chance you’ll need to throw that back hand down to stabilize yourself or help get the tail down when sliding.
Also, it can look especially steezy when done right with both hands on the ground!
It’s important to note that this trick will destroy your board’s tail pretty quickly.
If you value your board but still want to get sideways on two wheels, it’s a good idea to install a skid plate. Keep an eye out for a coming skid-plate review.
Alternately, invest in a cheap blank kicktail board or find something cheaper locally that you can beat on and not feel as bad about. These bamboo blanks on Amazon are an affordable option with good reviews and quick shipping: Pop Bamboo Blanks.
How to Glove Down Bluntslide in Four Steps
Step 1: Breaking traction
In order to break traction for this trick, you should be going at least 10 miles per hour so there is less resistance during the slide.
Keep your body position centered over the board so you can remain stable when you start to initiate your set up carve. The set up for this trick is exactly the same as a heelside coleman, the biggest differences come after you break traction.
To avoid flatspotting your wheels always make sure you don’t slide at a 90 degree angle.
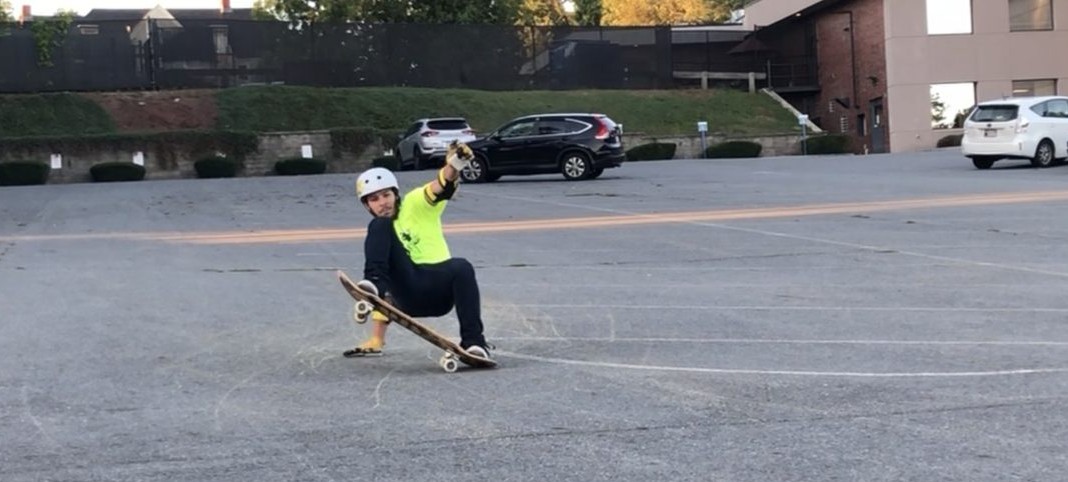
I start to break traction and get my tail to make contact with the ground for the glove down bluntslide at about a 45 degree angle. This makes it easier to stay on top of your board while the tail is dragging on the ground.
Step 2: Getting your tail to make contact with the ground
As you get your front hand on the ground and start breaking traction, it’s time to get your tail on the ground.
While still at that 45 degree angle, you’ll need to put as much weight as possible on your hand while still staying on top of the board enough so you don’t wash out.
As you get your weight distribution right, press your back leg down and you’ll hear the beautiful noise of wood scraping against the pavement.
Two super helpful tips here:
- Keep your front hand in line with your front foot as you are sliding so you don’t end up in a stretched-out position which will cause a fall.
- Stick your front arm straight ahead of you, this will help guide the slide forward and keep you from opening your shoulders which initiates a 180.
Biasing your weight from the board to your hand will make pressing the tail down easier and staying as on-top of the board as possible will make it easier to control the slide and get back up.
This takes a few tries to get right but it’s important to remember to use your body in addition to your legs to press the tail down. Pivoting at the hips to place more weight into the board can help in this regard.
If you try and press the tail down with just your back leg the slide won’t work out as the board will get away from you, or you’ll press the tail down but it won’t stay down because your body isn’t there to keep consistent pressure on it.
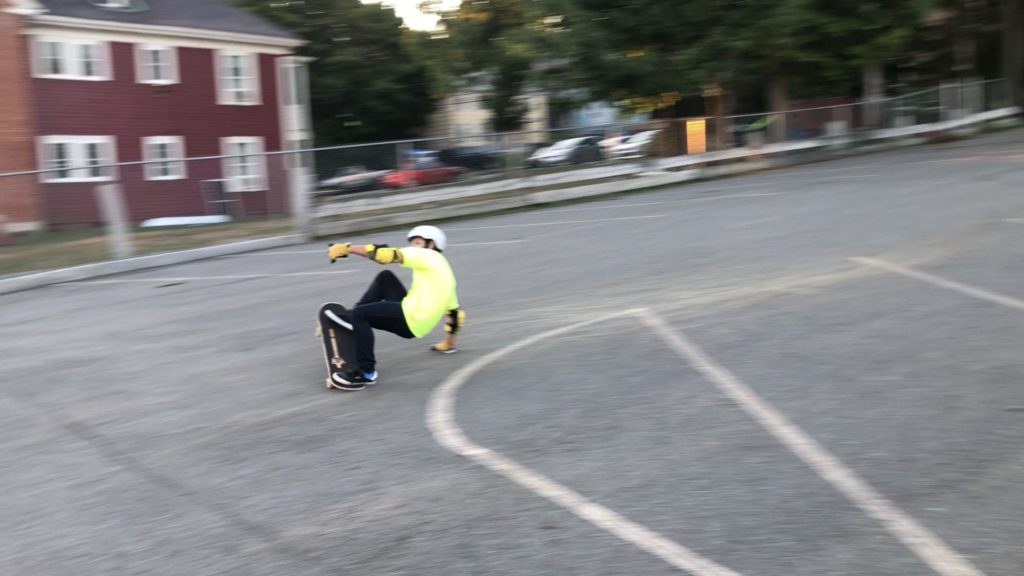
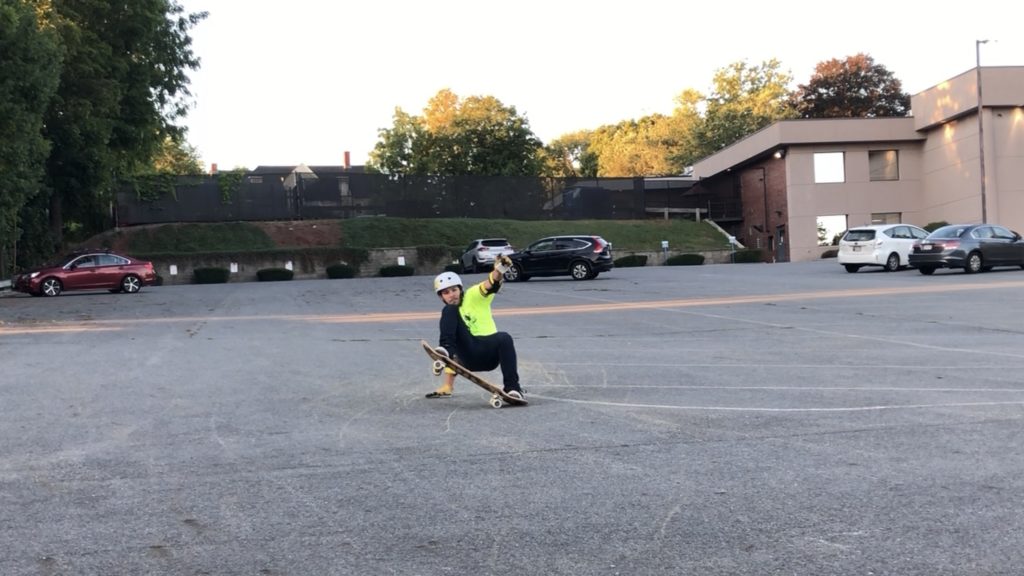
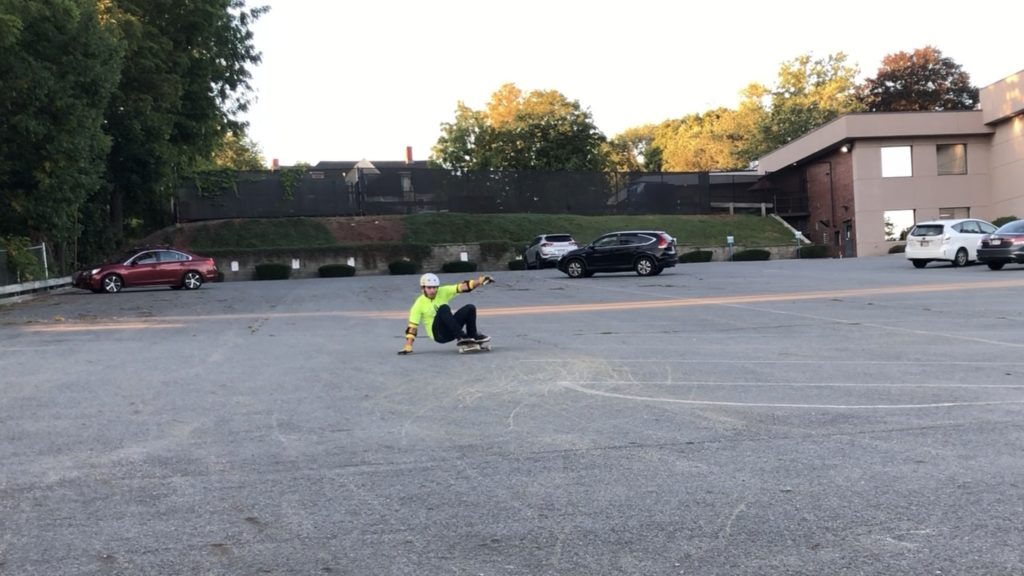
Step 3: Holding the slide out
At this point, your board’s tail is scraping across the ground and you’ll want to try and hold the slide out as long as possible for maximum steeze!
I find it helpful to turn my body a little bit past 90 degrees at this point to bring the board closer to me so I can keep that pressure on the tail. This helps to hold the slide out longer.
This also helps keep you sliding in a straight line which makes it easier to stand up as you’re getting ready to end the trick.
You can also lift your butt up off the ground (pivot at the hip!) to add an extra layer of control after you get more consistent at holding the slides out. Having your rear end up higher off the ground helps apply pressure to the tail which is needed to slide further.
As long as you keep that front arm facing straight ahead, you can slide as long as your wheels and speed level will allow.
The faster you go the further you can slide! Keep in mind, more speed means you’ll need your tail should quickly make contact with the ground to avoid icing out, or doing a regular heelside coleman.
Step 4: Getting back up
Getting up from the glove down bluntside has three distinct steps to ensure you roll away straight and steezy.
- Feeling when your board is ready to stop sliding
- Shifting your body position back to your regular stance
- Getting your tail off the ground and transferring your weight forward to get back up
Standing up is the hardest part of the slide because you’ll be getting up from a somewhat awkward body position. You’ll feel when the board is ready to stop sliding, you will start to lose speed quickly and sometimes the slide will feel choppy.
Side note: If you stay in the slide too long you’ll end up having to 180 in order to roll away from the trick and not end up falling. This is totally fine because 180 glove down bluntslides are still a cool trick! Below we keep going over how to roll away straight if you’re having issues with accidental 180s.
As you near the end of the slide, be sure to keep that front arm straight and shift your body position and weight foward to stop sliding sideways. This will ensure you roll away in your regular stance.
Bringing your front hand closer to your body will help transfer your weight forward. It’ll provide a little momentum to vault you back up.
As you’re brining your front hand closer to your body, push your front leg back down and use the small bit of momentum generated to stand back up. It’ll feel unnatural at first but with time and practice, you’ll get used to it!
Conclusion
The biggest thing to remember here is that the glove down bluntslide is a hard trick and it’ll take some time to get down!
Don’t get discouraged if you can’t roll away straight or keep 180ing. If you 180 and roll away, it still looks like a dope trick. Embrace it! If you finish the slide at a 45 degree angle and don’t have much roll speed out, that’s alright too. Throw down a slow fakie shuvit and impress your friends anyway.
Also, trying to learn this trick on softer wheels with a longer deck will be tougher than with a shorter, hard wheeled, tech slide setup. When you land your first one with 78a or softer wheels, it’ll feel that much more rewarding!
If you have any questions post a comment below and we’ll help you out!