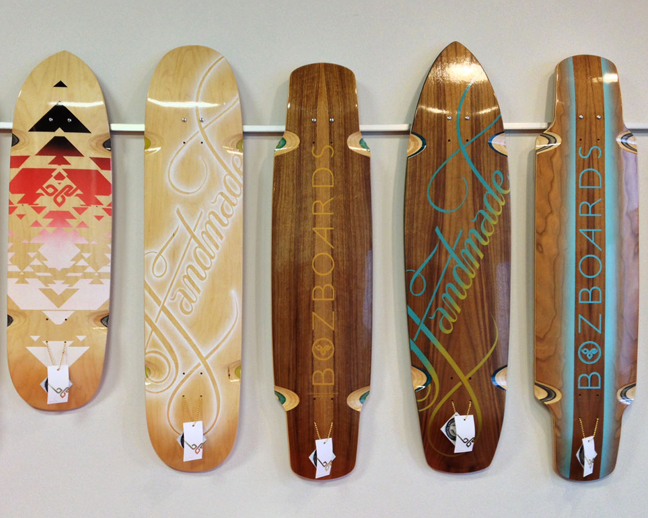
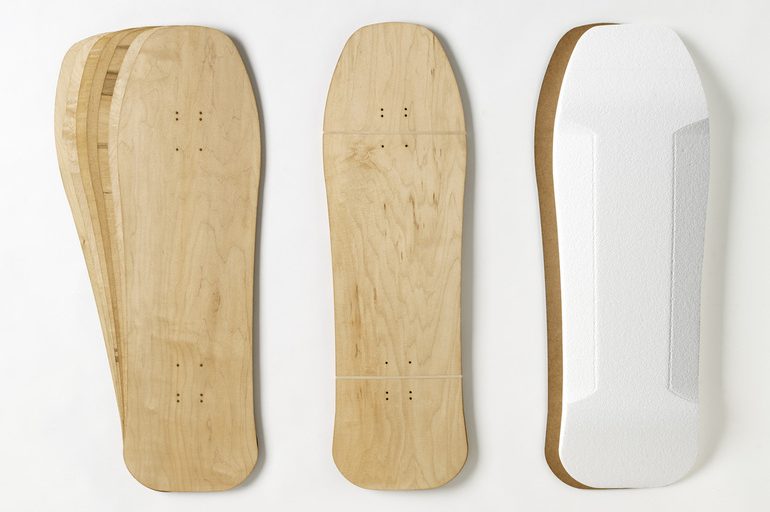
As more and more skateboard manufacturers enter the longboarding market, the diversity of choice has never been better for the modern skater. From shapes and sizes to materials and concave, there are numerous options to choose from. Still, there’s nothing as satisfying as designing, building and riding your own creation.
Roarockit’s Thin Air Press kit makes this possible from the comfort of home. Make no mistake, it’s not lacking in features. Follow along as we review our TAP kit and it’s result.

Introduction
If you want light and rigid for downhill, you can find pure carbon decks. If you want a long, flexible dancer, you can go for a bamboo deck. Drop-through cruiser with light concave made of 7-ply canadian maple? Not a problem. The options are so many it is difficult to choose just one – after all they each have a unique ride.
DIY has been a component of the skateboarding community since its birth. From the old school, homemade 70’s decks made of leftover plywood to 3D printed parts we are starting to see nowadays, riders have always been experimenting in pursuit of better performance, individualism or just the satisfaction of riding something they made.
If you are one of those people and want to get into board building, a Roarockit TAP kit is probably the easiest and most cost effective way to make your own professional quality deck using minimal tools and experience.
Roarockit is a Canadian company founded in 2002 that sells what they call a Thin Air Press (or TAP). This press uses the same principle as vacuum bags used to save space when packing clothes. With this kind of press, you can make your own skateboard without the need of an expensive and space consuming hydraulic press and concrete molds.
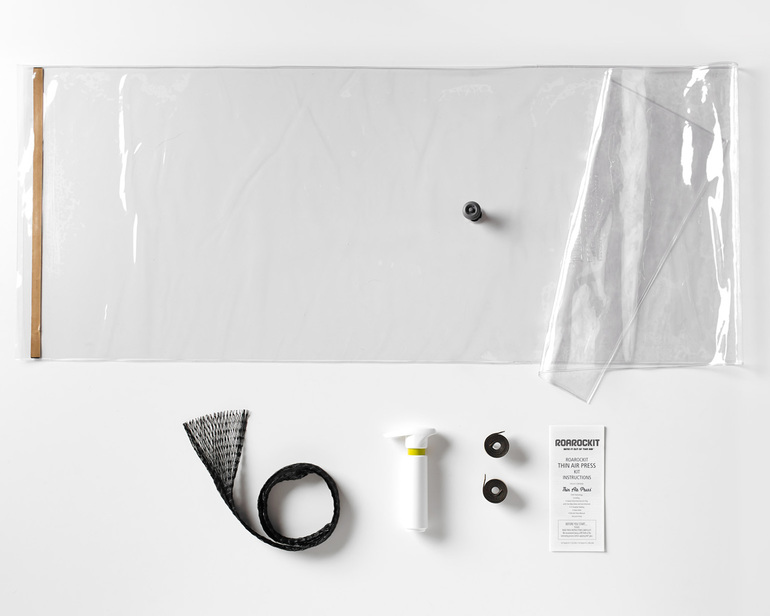
Being one of the DIY people, I was very interested in this concept and ordered a basic TAP kit. The most basic kit consists of a thick vinyl vacuum bag, a manual vacuum pump, breathing net, extra sealing tape and illustrated instructions and maintenance sheet.
More complete kits can include a bigger pump, a foam mold, wood glue, a scraper, veneer (maple, birch and/or bamboo, glue roller, measuring cup and sandpaper, pretty much everything you need to build a deck from start to finish. There are multiple sizes of vacuum bags to choose from and Roarockit also offers veneer, replacement sealing tape, wood glue, pre-shaped molds, ruler with bolt patterns and so on.
TAP Kit Contents
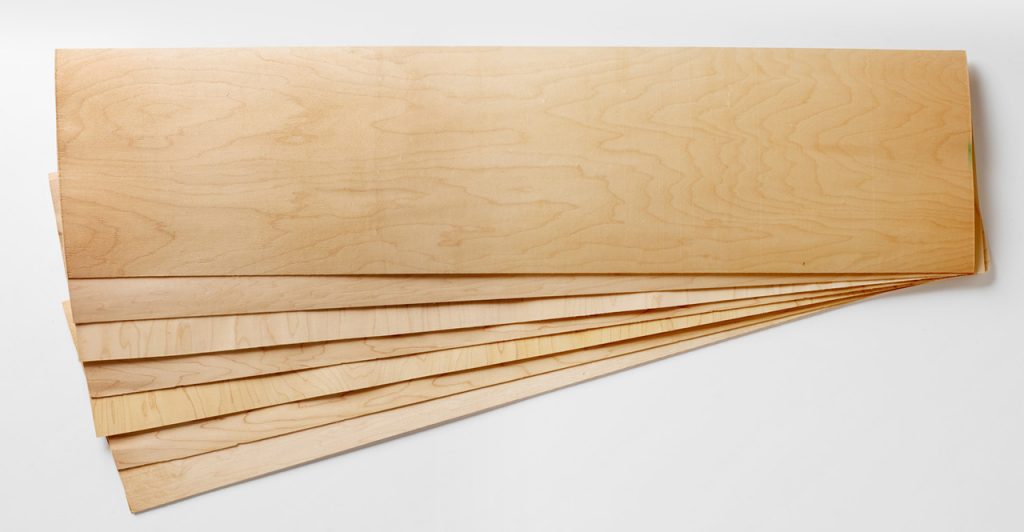
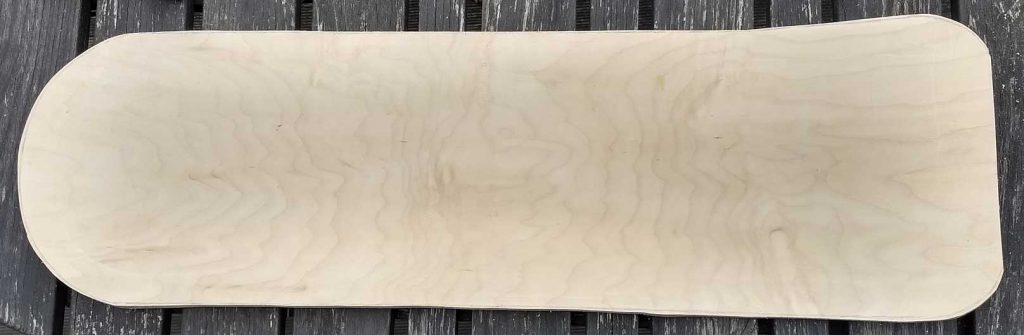
The bag I got is 20 x 70 inches, which allows me to press anything from a small mini cruiser to a big dancer. I also ordered 7 sheets of Canadian maple veneers since it isn’t something easy to find where I live, but also because Roarockit provides very high quality veneers.
As demonstrated in the video below, they thoroughly inspect the veneers before shipping to guarantee that customers only get the ones in perfect condition use in skateboards.
The veneers also come in different categories: face veneers for the top and bottom, core veneers that can have small imperfections which won’t affect the quality of the final product, and crossband veneers that add torsional strength and prevent splitting.
When I got my package, I could attest to their quality control as all seven veneers were in pristine condition. It’s also a good idea to leave the veneers at the place they are going to be worked with to acclimatize for a couple of days in order to prevent warping of your final deck.
Designing Your Deck
Before starting to build your deck (or even before buying the TAP kit), I recommend checking out the Roarockit Youtube channel.
They have very comprehensive video tutorials on all the steps you’ll go through when building your skateboard, tips and tricks as well as troubleshooters, so when it’s time to get to work, you’ll have a good idea on what to do.
Paper Template
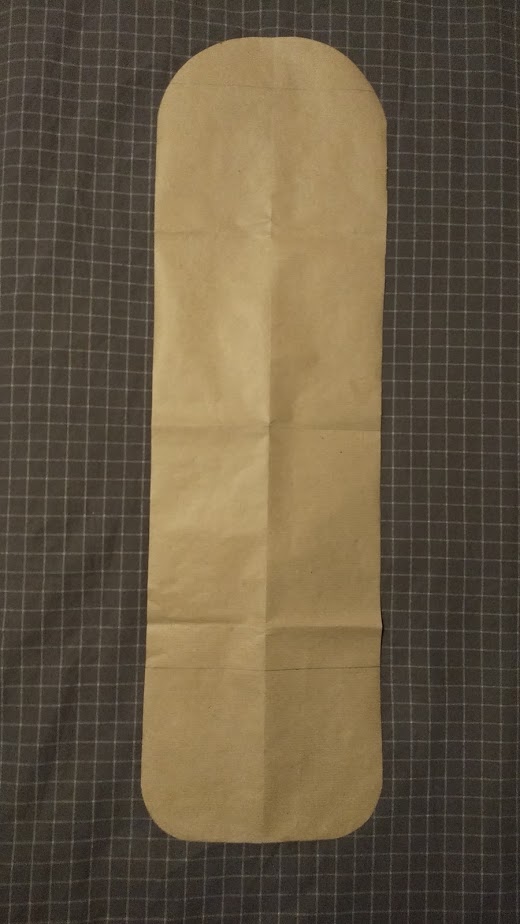
The first step is to design the board you want to build.
Once you’re comfortable with your design, reproduce it in actual size on a piece or pieces of paper that will serve as guide for the hard foam mold.
Roarockit has a video on this process below.
Getting Started
I wanted to make a simple mini-cruiser with a kicktail and light concave. A little reminiscent of Roarockit’s own old school refill kit below. It was a good choice for my first build and it made getting started rather easy. I suggest choosing a simple design with modest concave for your first press. It’ll make it easier to shape the mold and cut the glued deck.
When designing the deck, remember that wood can only bend in one direction. For example, if you want to have kicktails, the curvature of the concave should end a few inches before the curvature of the kicktail begins. Also, if the concave is too aggressive, it’ll be more difficult for the press to bend the veneers.
Once you’ve got some more experience, feel free to go wild – the TAP kit is very capable.
Molding The Foam
Once the paper template is done, cut it out and place it on top of the hard foam. Draw the outlines of the deck as well as the concave lines as this will serve as a guide to shape the mold.
It is a good idea to wrap the foam mold in packing tape, so chunks of foam won’t break in case some glue from the pressing sticks to the mold, so you can use your mold for many more pressings. Here’s another video tutorial on how to shape your own foam mold.
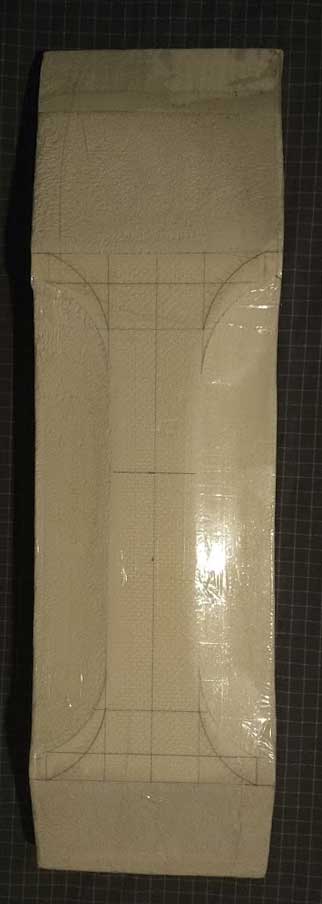

The bottom of my foam mold, taped up! 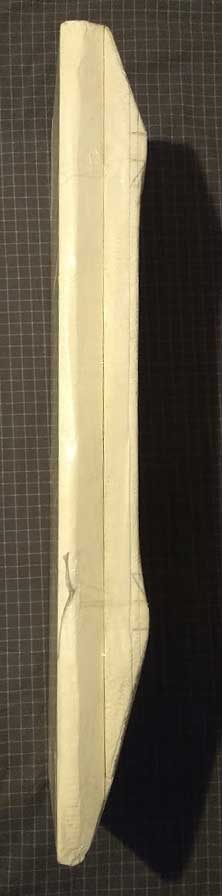

How the side profile of my foam mold looks
Pressing
With the mold ready, it’s also a good idea to do a dry run. That means pressing the deck without the glue. Simply put the veneers on top of the mold and then slide the assembly into the bag.
Next, seal the bag and pump the air out. A dry run affords a bit of practice with the process and an opportunity to observe and correct potential mistakes before the glue is brought in.
It also ensures the TAP bag is properly sealed. If there’s any air leakage, in most cases it is coming from the sealing tape not being properly sealed, so have a look at it and open everything up if necessary.
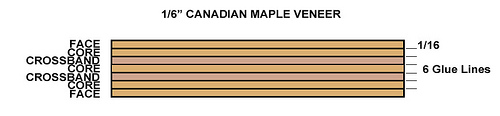
Before glueing it up, you have to organize the veneer in the correct order:
In the glueing step, you have to be a bit quick because wood glue sets quickly, so ideally you should be able to apply the glue to all veneers, put it in the mold and inside the bag and vacuum it in 10 minutes or less.
Here I recommend having somebody to help you or you can do the pressing in two steps. For example, in a 7 ply deck, you can first glue up 4 sheets of veneer, press it, let it dry overnight (8 hours minimum), and then glue up and press the remaining 3 veneers. The final result is the same and you can be sure that the first layers of glue won’t have dried by the time you manage to press it.
For aggressive concave, it’s also a better idea to do the glueing and pressing in multiple steps as there’ll be less resistance from just two sheets of veneer to bend at a higher degree than 7 sheets at once.
If you press in stages, keep in mind that when making decks close to the full-width of the veneers, it will be very important to ensure the centerline of each half matches. If they are offset, you may have trouble making it the full width. Be sure to use waterproof wood glue, it costs about the same as regular wood glue and adds extra protection and longevity to your deck.
In The Bag
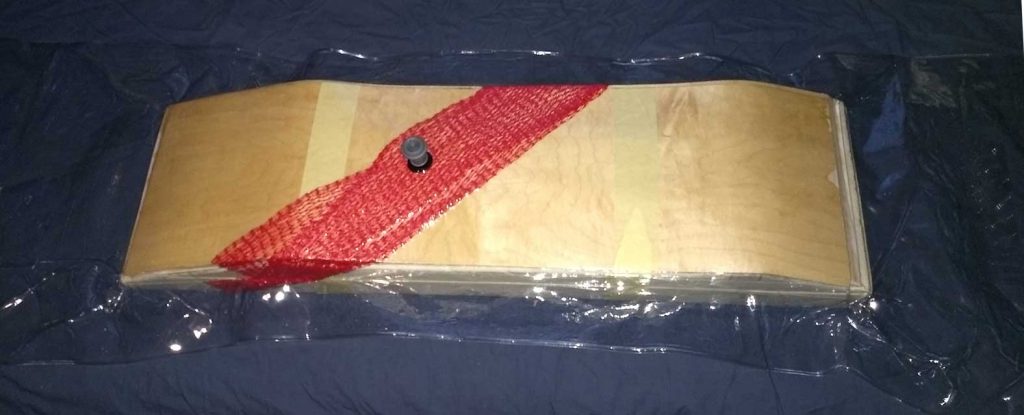
You may notice the bag creep while pumping the air out but it’s no reason for concern. Thankfully the bag is sturdy and this situation is easy to fix. Hold firmly the bag and with the other hand pull the sides of the bag out. Don’t worry about being too rough, the vinyl bag is strong and can take it.
The seal is also easy to use and if you follow the instructions in the video-tutorials you won’t have problems with it, but it can take a couple of tries to get the TAP bag properly sealed. In my first dry run I didn’t properly seal the bag and after about 10 minutes I noticed some leakage, but on the second try it was all good.
Removing The Board From The Bag
With your deck pressed properly, it’s time to wait for the glue to cure. That takes a minimum of 8 hours, but unless you are really in a hurry, it doesn’t hurt to leave it in the bag for one full day. For the first two hours after you press it, go have a look at the bag every 20 minutes or so, just to be sure there’s no air leakage.
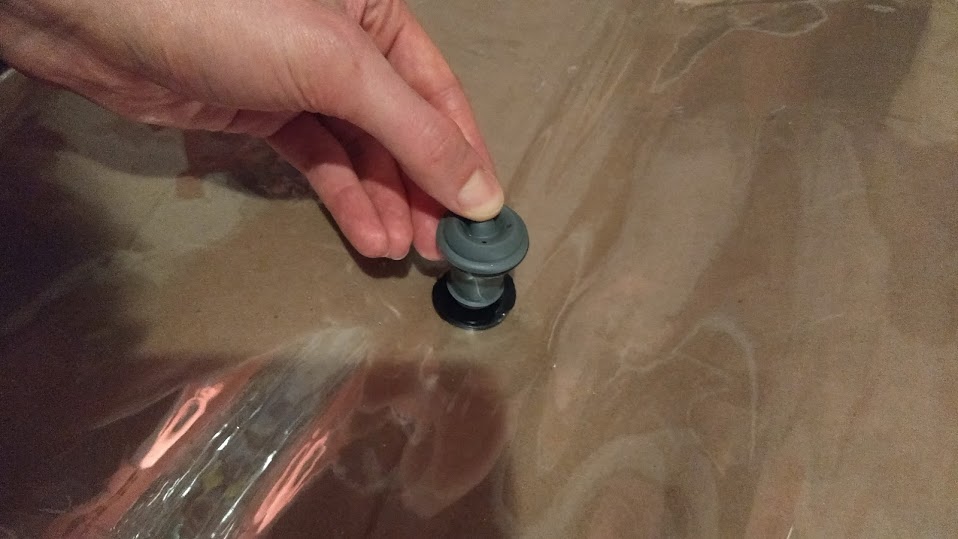
With the deck pressed and the minimum 8 hours wait, it’s time to take it out of the bag. This process is very simple: just tip the valve cap to the side to let some air inside the bag and then open the sealing tape. Using a sharpie will make this very easy:
Be careful for the sealing tape to stay just on one side of the bag, but don’t worry if there are tiny bits on the other side. Before taking the pressed deck and mold out of the bag, take that strip of paper that came with the sealing tape and put it back on, this way it’ll stay clean and last longer.
Storing the bag is very simple, just fold it the same way it came in the package, being careful not to put stress on the valve. There might be bits of glue that stuck to the bag which can be easily removed with your fingers. Do this every time you remove a pressed deck from the bag and before storing it to maximize service life.
With the deck removed from the bag, check if the veneers are all firmly glue together. In case you see they are a bit apart from each other on the edges around the deck, don’t worry as in most cases the inner part will be solid.
After you take the deck out of the vacuum bag, leave it to dry for a few days before cutting and sanding. It’s easier to cut when it’s just out of the press, but it’s better to wait a bit.
Cutting & Sanding
After it’s had time to dry, draw a centerline on the uncut deck in order to align it with the center line on you paper template. Take your paper template and put it on top of the uncut deck, align the centerlines and draw the outline for cutting.
You can also tape or even glue the paper template on the uncut deck, but in my opinion this is unnecessary work and can damage or completely ruin you paper template (if you glue it), so you won’t be able to use it again.
When cutting, be sure to wear protective equipment – goggles and a dust-mask (or respirator if working indoors) are cheap insurance against potentially serious injuries. Stay safe!
You should cut your deck outdoors if possible because this is a messy process and cleaning wood dust is time consuming, but most importantly because small dust particles will stay in the air and breathing them is bad for your lungs.
If you absolutely don’t have the option of doing it outdoors, be sure to get a good respirator and ventilate your workplace or use a good dust mask and and air filtration system.
Now that you’re protected, install the proper jigsaw blade, clamp the deck to your workbench (don’t ever just hold it by hand, it’s dangerous) and slowly start cutting it. Take your time here as it’ll make a big difference in the final look.
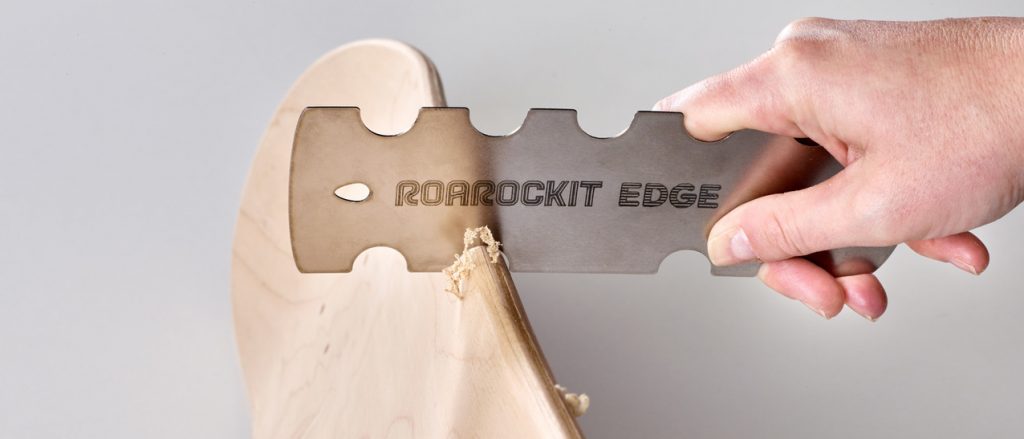
After cutting, it’s time to sand everything. Start with the rails to get a nice rounded profile. Roarockit has a very convenient tool available for this job, but it can easily be done by hand.
When standing, start from 120 or 180 grit and incrementally switch up to 500 depending how smooth you want to make it. To avoid scratches on your deck, always sand with the grain if you’re going to do it by hand and if you want to use a power tool, an orbital sander or random orbit sander are the ways to go, as a disc sander will scratch it as well.
After Cutting And Sanding
In case you get a TAP kit that comes with pre-cut veneers, the veneer will already be in the shape of you final deck so you’ll only need to sand it, giving special attention to the edges.
Painting & Drilling
Drilling
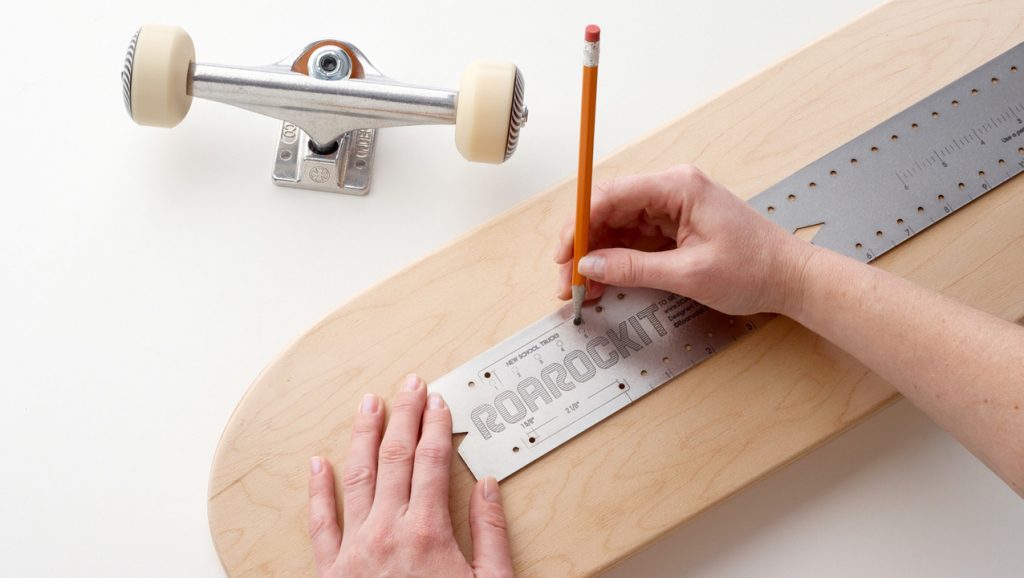
Here’s another step where patience is very important. Crooked bolt holes look bad and directly affect how your deck will ride. Further, redrilling is not always possible so measure and drill with caution.
What I recommend here is aligning the deck centerline with a truck baseplate, and use its bolt holes to mark where you’re going to drill.
With the markings done, clamp the deck to the workbench, drill the first hole and check using the baseplate if it aligns with the others. Repeat this process until all bolt holes are done. A proper wood drill bit will make this process easier and avoid chipping your deck.
Roarockit’s RockitRuler makes easy work of this task:
Painting
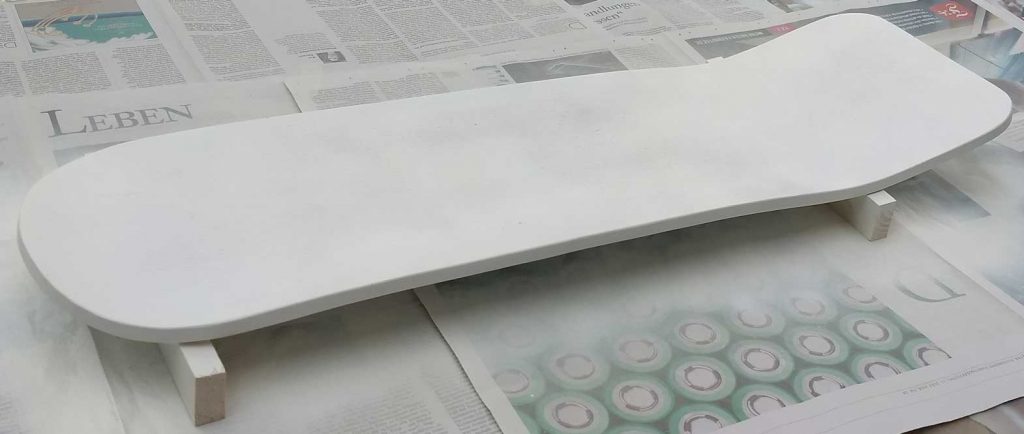
For painting the deck I used a good quality spray paint. It’s not the cheapest way, but it’s easy and gets the job done quickly. No matter how you’re going to paint yours, be sure to get a waterproof paint that’s appropriate for wood.
You can paint the deck before drilling so paint won’t go inside the bolt holes which can make installing hardware a bit more difficult, but this is personal preference. Before painting, clean the deck with a slightly damp cloth in order to remove all wood dust from it.
Finishing And Enjoying
Gripping & Setting Up
Ideally, you should also wait about a week before setting up and riding your deck, just to be sure it’s dry all the way. For gripping and installing hardware, there are plenty of easy to find online videos on how to do it.
One mistake I did, and noticed it only when installing the hardware, was that I drilled the bolt holes in a curved section of the deck, they were too close to the nose and kicktails. Luckily I was able to circumvent this issue by using thick, soft riser pads, but I’ll be paying more attention to that in future builds.
Enjoy The Ride
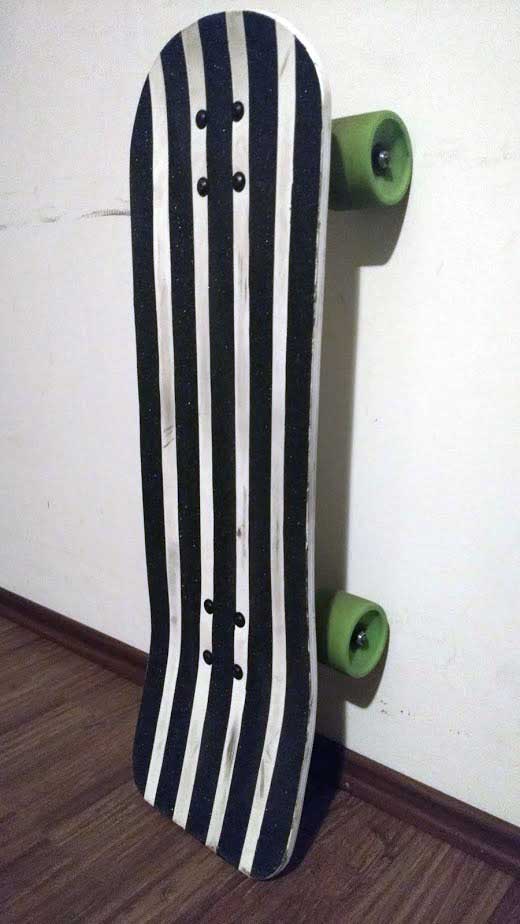

The finished product – grip side 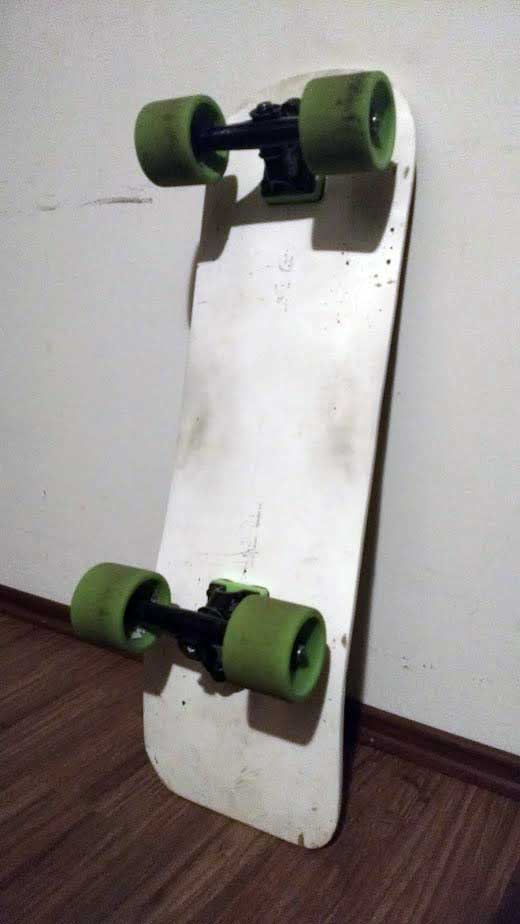
The finished product – pavement side
With my deck finished, gripped and set up, I went for the first ride. Cautious at first, even though the deck felt very solid, but after a few dozen meters I was confident enough to shred it as I would do with any other deck and it felt just as good as a factory made one.
I used it quite a few times for cruising and commuting, popping an ollie every now and then, and it’s still holding very well, no structural weaknesses visible.
Final Thoughts
I’ve been very happy with the result from my TAP kit and I had a lot of fun in the process. I intend to use it again soon to build both dancing and downhill decks.
I’m very satisfied with the quality of the bag and the level of support and technical information from Roarockit. When I began with the hands on work, I had a good idea on what to expect during the build and didn’t have unexpected issues.
The TAP kit from Roarockit is great for beginners as well as professional board builders. Riding a deck you build from scratch has a special feeling and the Roarockit TAP kit allows you to do it without the need of professional tools and lots of experience.
It is actually used to teach kids how to laminate wood, so pretty much anyone can do it. If you want to do like the old school skaters but with an upgrade, it’s a sure way to go.
Advantages: cheaper and easier to handle than a traditional press, provides even pressure all around the deck, molds are easy and cheap to make, doesn’t take much storage space, very portable, easy maintenance, doesn’t require many tools and woodworking experience.
Disadvantages: not as much pressure as with a hydraulic press (doesn’t mean the deck will be weaker), can press only one deck at a time, agility is required for applying glue and pressing, sealing tape can be problematic until you get used to it.
Extra Tips:
- Be sure to watch the video tutorials before buying the kit. It will give you an idea of the process thats involved and you’ll have a better idea if this is for you.
- Customer service is very useful and friendly, I had many questions before buying my kit and they were answered quickly via their Facebook page. If you have any doubts, reach out to them.
- When ordering a TAP bag, you’ll have the option to get the air valve in the center or offset. If you’re going to work only with wood glue, you’re fine with the centered valve. In case you’re going to use composite adhesives like epoxy, get the valve offset so it doesn’t get clogged.
- This is a time consuming process, specially for first time builders, so don’t rush it, as the result will be much better if you take your time.
Interested in new product reviews and exclusive interviews, like this one with Roarockit? Sign up below!